Question
What are the first steps to secure a wireless home router, and why is it critical to change defaults immediately?
Answer
Change the default admin password, update firmware, and change default SSID (Service Set Identifier)/password. Default credentials (often "admin/admin") are publicly documented and easily found on the internet — leaving them unchanged gives anyone instant access.
First-priority actions when setting up a wireless router:
- Change the default admin password — the password used to access the router's configuration GUI (Graphical User Interface)
- Change the default SSID — "Linksys" or "NETGEAR" tells attackers your router brand and likely vulnerabilities
- Set a strong Wi-Fi password — use WPA2 (Wi-Fi Protected Access 2) or WPA3 (Wi-Fi Protected Access 3) with a complex passphrase
- Update the firmware — patch known vulnerabilities
Why defaults are dangerous:
- Router manufacturers publish default IPs, usernames, and passwords in their documentation
- Websites like
routerpasswords.comcatalog defaults for every router model - If you don't change the admin password, anyone on your Wi-Fi can reconfigure the router
- Default SSIDs reveal the brand → attacker knows which exploits to try
Accessing the configuration:
- Connect via Ethernet or Wi-Fi
- Open a browser to the router's default IP (typically 192.168.0.1 or 192.168.1.1)
- Log in with default credentials (found in documentation or printed on the router)
Go deeper:
 Default password (Wikipedia) — why unchanged defaults are a major compromise vector (Mirai botnet).
- Residential gateway (Wikipedia) — the all-in-one home router/switch/AP and its default-credential/backdoor risks.

Note saved — thanks!
Question
What are the six steps for basic wireless setup on a home router?
Answer
View defaults → select network mode (802.11 standard) → configure SSID (Service Set Identifier) → select channel (use non-overlapping 1, 6, or 11) → select security mode (WPA2 (Wi-Fi Protected Access 2)/WPA3 (Wi-Fi Protected Access 3)) → set passphrase.
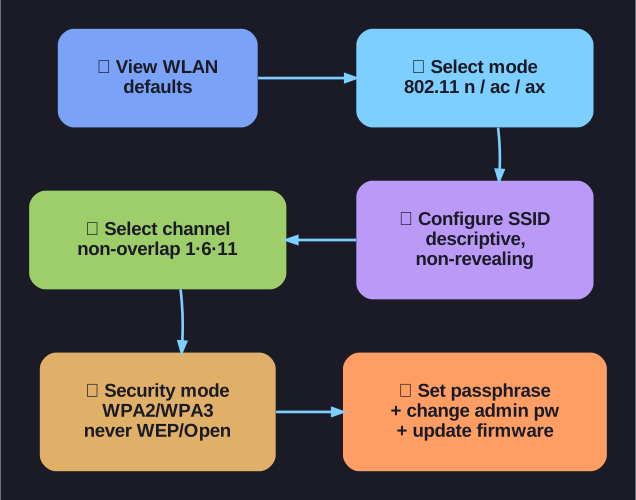
* Six-step home-router wireless setup. *
Step-by-step basic wireless setup:
| Step | Action | Key Decision |
|---|---|---|
| 1 | View WLAN (Wireless Local Area Network) defaults | Understand what needs changing |
| 2 | Change network mode | Select the 802.11 standard to use (e.g., 802.11n/ac/ax) |
| 3 | Configure the SSID | Choose a descriptive but non-revealing name |
| 4 | Select the channel | Use non-overlapping channels: 1, 6, or 11 for 2.4 GHz |
| 5 | Select security mode | Choose WPA2-Personal or WPA3 (never WEP or Open) |
| 6 | Set the passphrase | Strong password — minimum 12 characters with mixed types |
Network mode considerations:
- Mixed mode (e.g., "802.11b/g/n"): Supports older devices but reduces performance for newer ones
- N-only or AC-only: Better performance but excludes older clients
- Best practice: Use the newest standard your devices support; disable legacy modes if possible
Channel selection: If you have neighbors with Wi-Fi, use a Wi-Fi analyzer app to see which channels are congested, then choose the least-used non-overlapping channel.
Go deeper:
 List of WLAN channels (Wikipedia) — the channel/frequency tables backing the non-overlapping 1/6/11 choice.

Note saved — thanks!