Quiz Entry - updated: 2026.10.13
What are the steps of the ESP-IDF command-line workflow, from a project folder to a program running on the ESP32?
idf.py set-target esp32 → idf.py menuconfig (optional) → idf.py build → idf.py -p /dev/ttyUSB0 flash monitor, then edit and repeat; exit the monitor with Ctrl+].
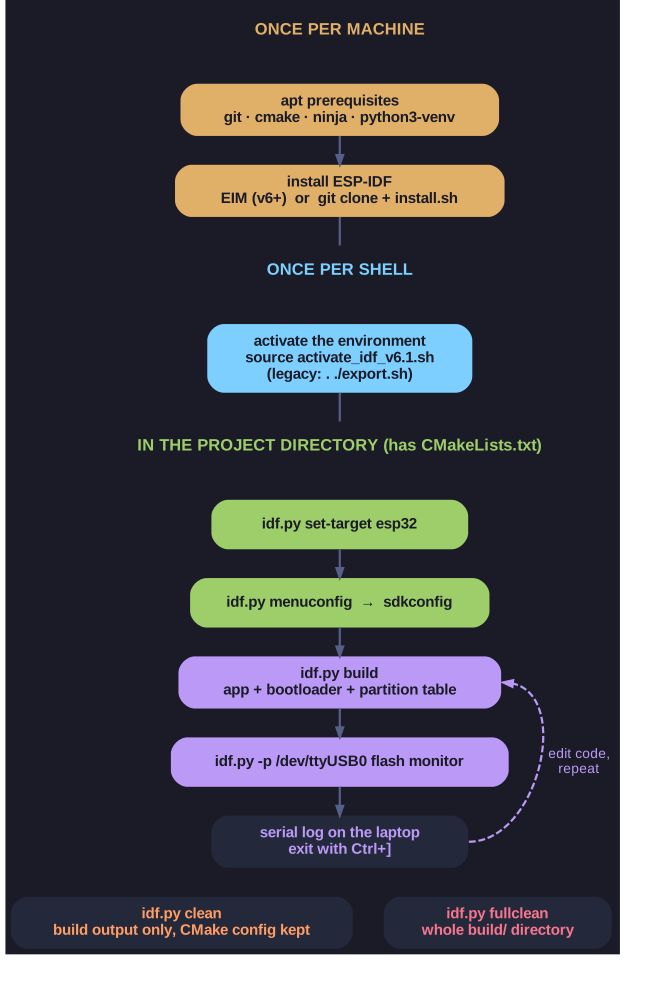
* The one-time setup, the per-shell activation, and the per-project loop of ESP-IDF. *
idf.py set-target esp32chooses the chip. ESP-IDF supports several (ESP32, ESP32-S3, -C3, …) with different cores and peripherals, so the target decides which compiler and which defaults are used. Changing it clears the build directory and regeneratessdkconfig.idf.py menuconfigopens the configuration menu (see the next cards). Skip it to keep the defaults.idf.py buildcompiles your app and every ESP-IDF component it uses, and produces three binaries: the bootloader, the partition table (how the flash is divided) and the application.idf.py -p /dev/ttyUSB0 flashwrites those binaries over the USB-UART bridge, which appears on Linux as/dev/ttyUSB0.flashrebuilds first if anything changed.monitoropens a serial terminal on the same port, so you see the program'sprintfoutput. Ctrl+] leaves it.
Chaining flash monitor in one command is the normal loop: change code, run it, read the output.
The commands are the same on every operating system; only the port name differs. On Linux the board is usually /dev/ttyUSB0, on macOS /dev/cu.usbserial-… or /dev/cu.SLAB_USBtoUART, on Windows COM3 or similar. Leave out -p and idf.py tries to find the port itself.
Go deeper:
 ESP-IDF — IDF Frontend (idf.py) — every
 idf.pycommand with its options.- ESP-IDF — Build System — projects, components and what
idf.py builddoes with them.